USPS® Account Setup Guide
USPS® requires a business account to access their APIs and the setup is straightforward.
CREATE BUSINESS ACCOUNT
STEP 1-1
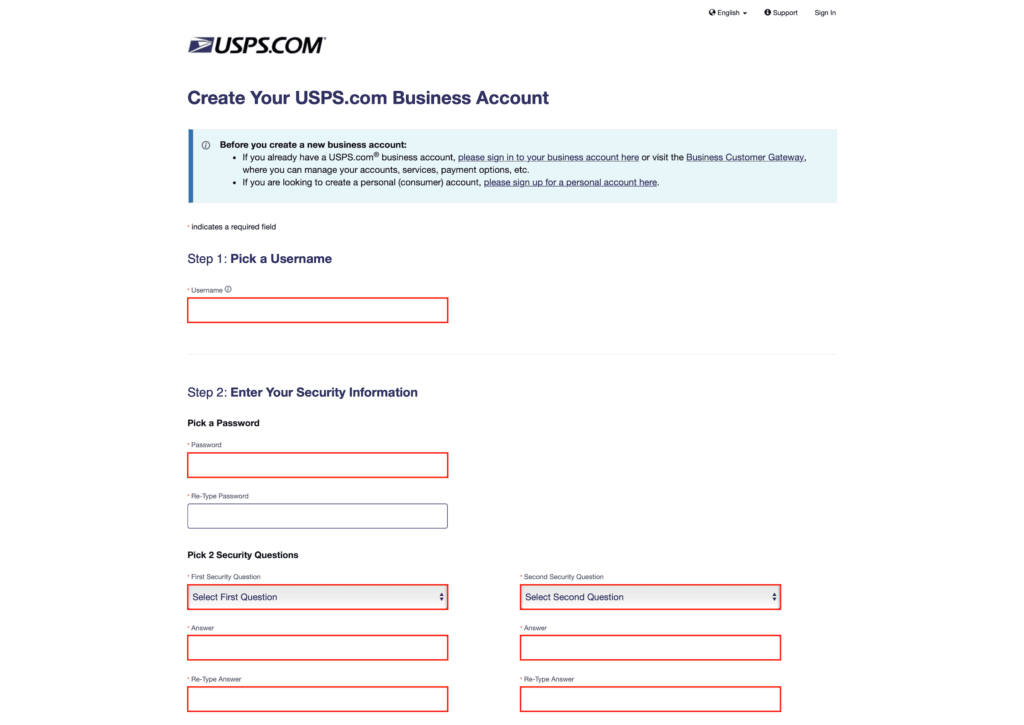
Please click on USPS.com Business Account setup to go directly to sign up page. Pick a good username and password. Then pick two security questions and input your answers for them.
STEP 1-2
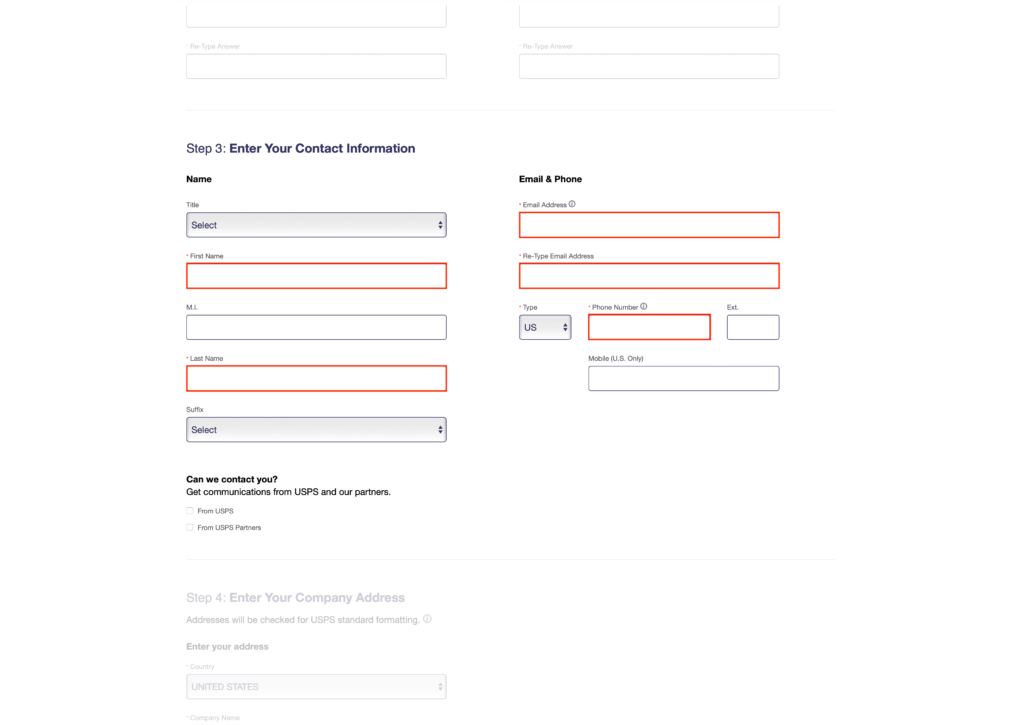
Simply input your full name, email address, and your phone number. Mobile phone is optional.
STEP 1-3
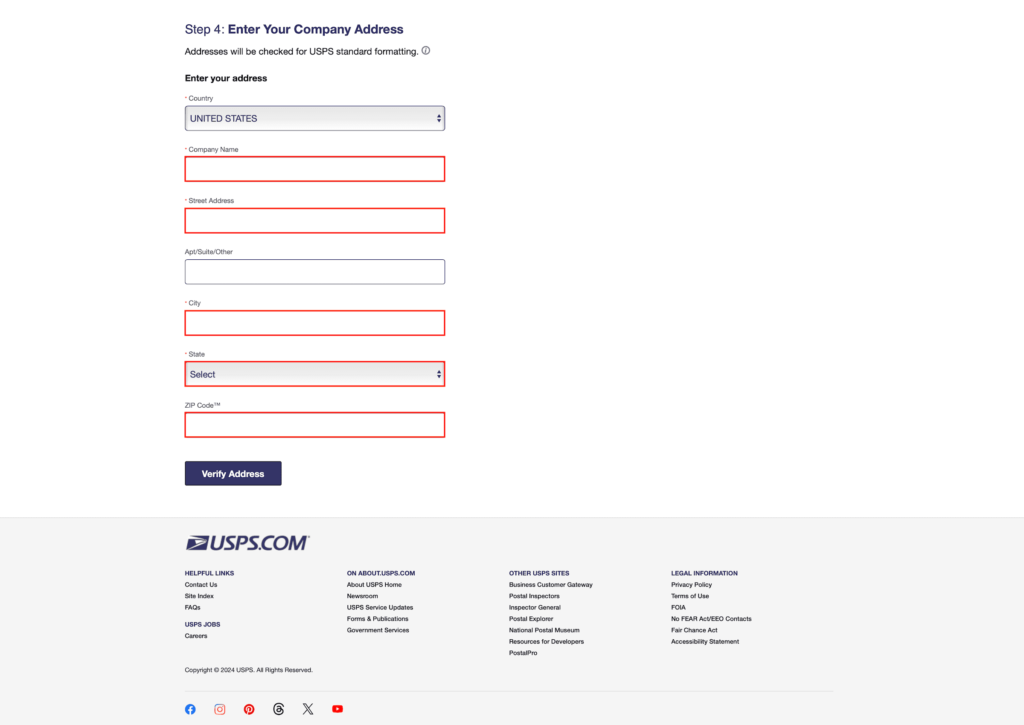
In this step, you will be inputing company information such as your company name and a physical or mailing address. Please be advised that USPS® requires address verification before continuing.
STEP 1-4
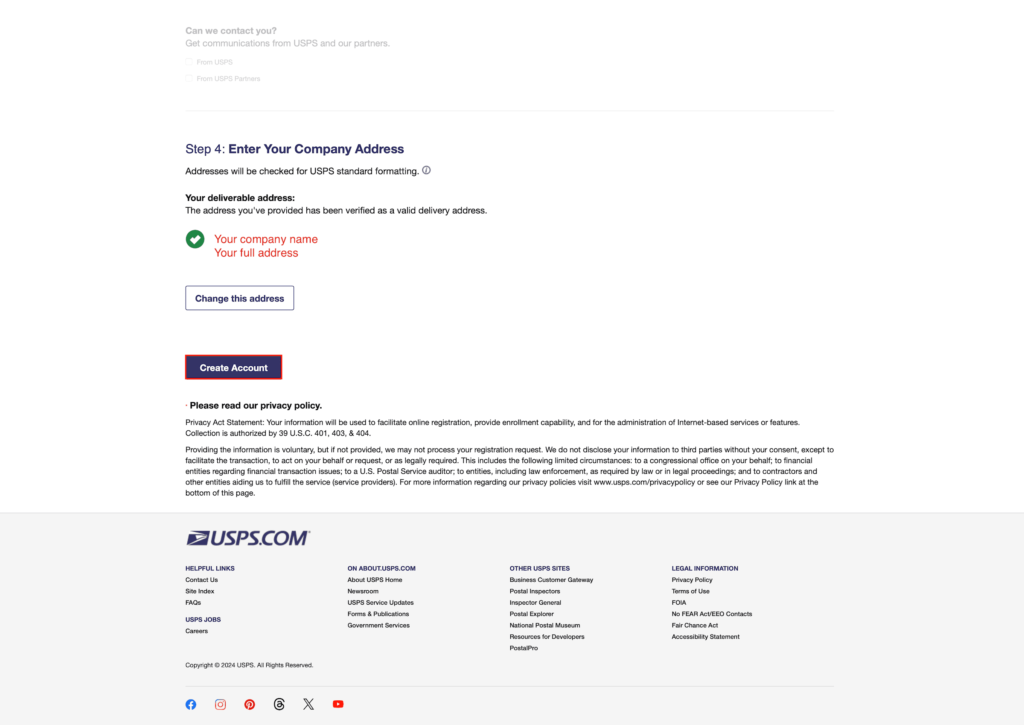
Once your company information is verified, please click on ‘Create Account’ and continue onto to set up your Business Customer Onboarding Portal.
STEP 1-5
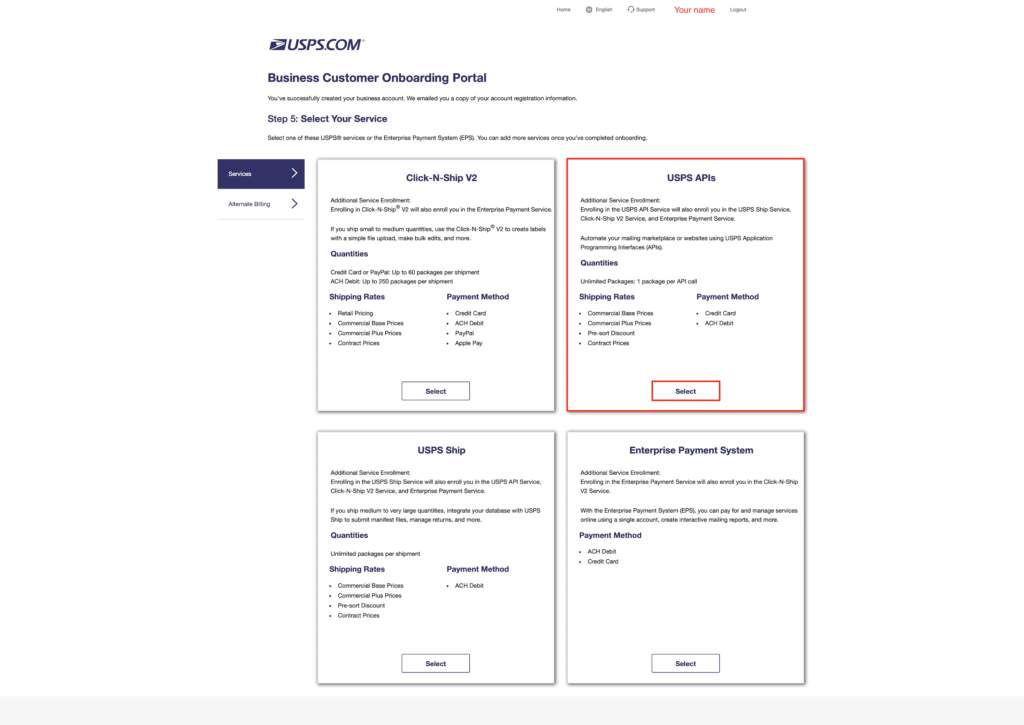
In Business Customer Onboarding Portal, you will be setting up to access USPS® API keys. Please choose “USPS® APIs” and click on ‘Select’.
STEP 1-6
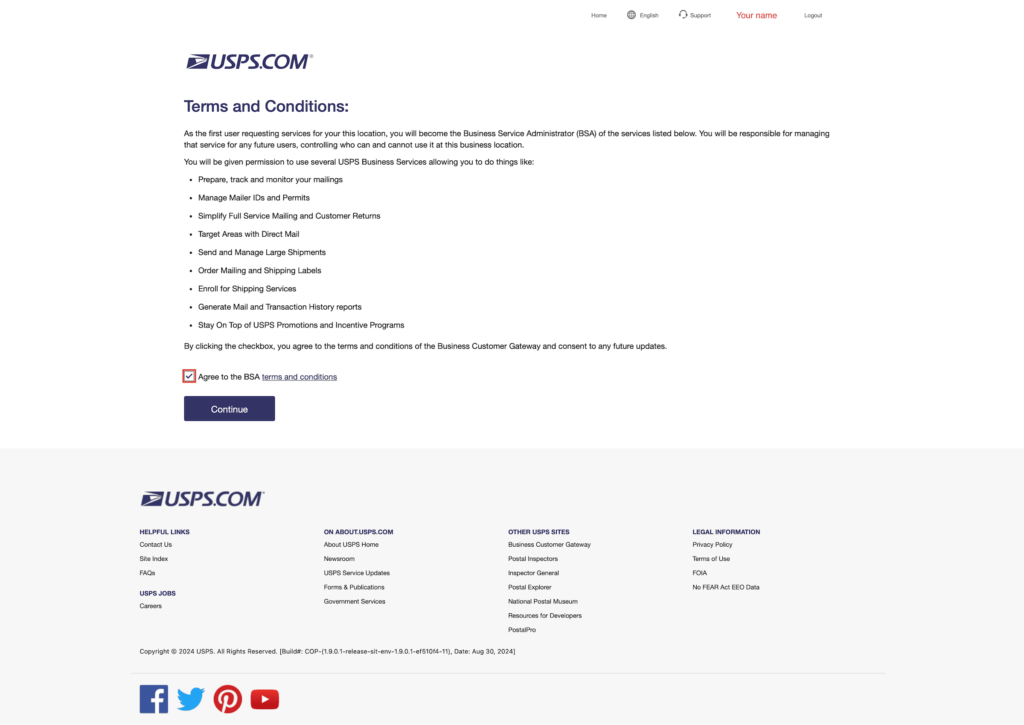
Check the box for “Agree to the BSA…” and click on ‘Continue’.
STEP 1-7
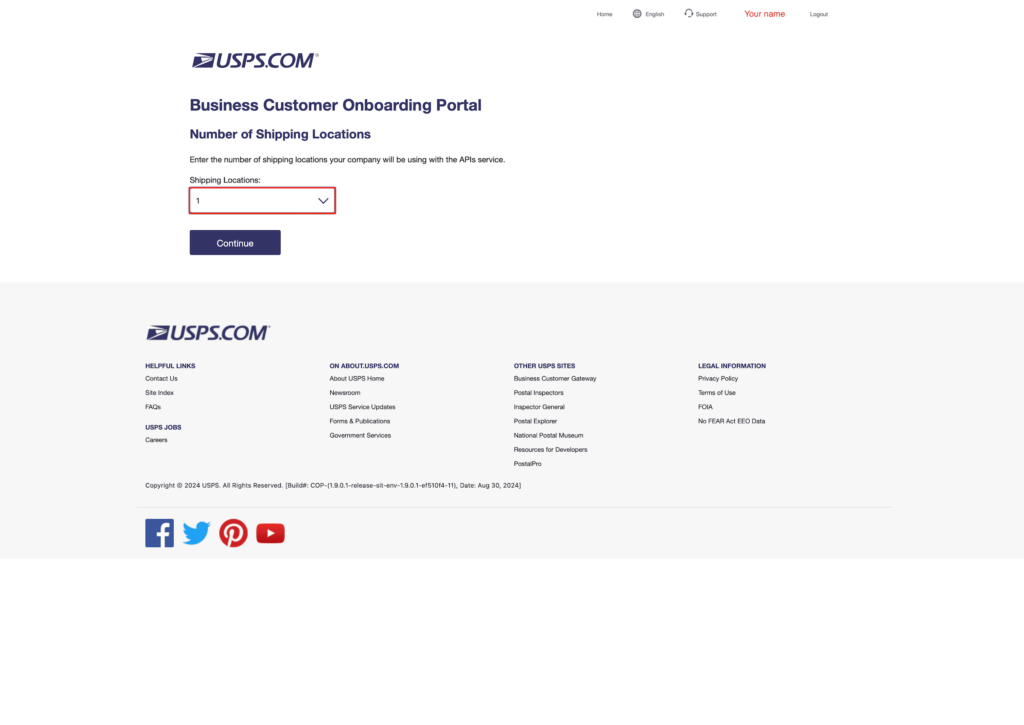
You can add more than one shipping location but since you can add additional later, let’s start with “1” first and please ‘Continue’.
STEP 1-8
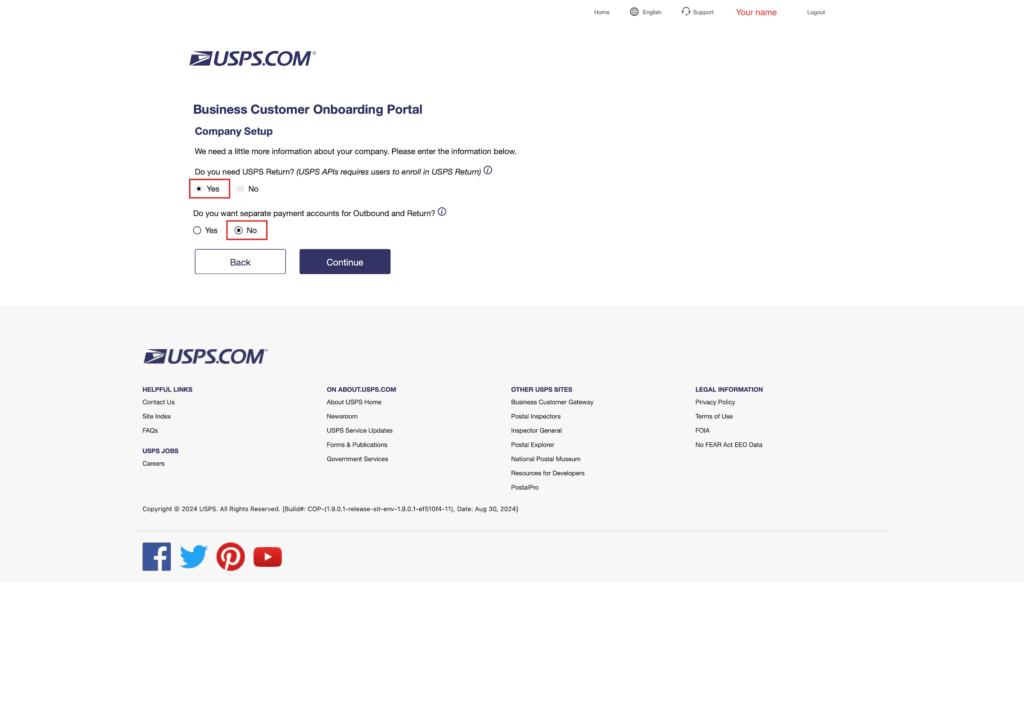
For “Do you need USPS return?”, please choose “Yes”. USPS® requires users to enroll in USPS® Return so by default, “Yes” is already chosen. For the second question, it is more efficient to utilize one payment so please choose “No”. Click ‘Continue’.
STEP 1-9
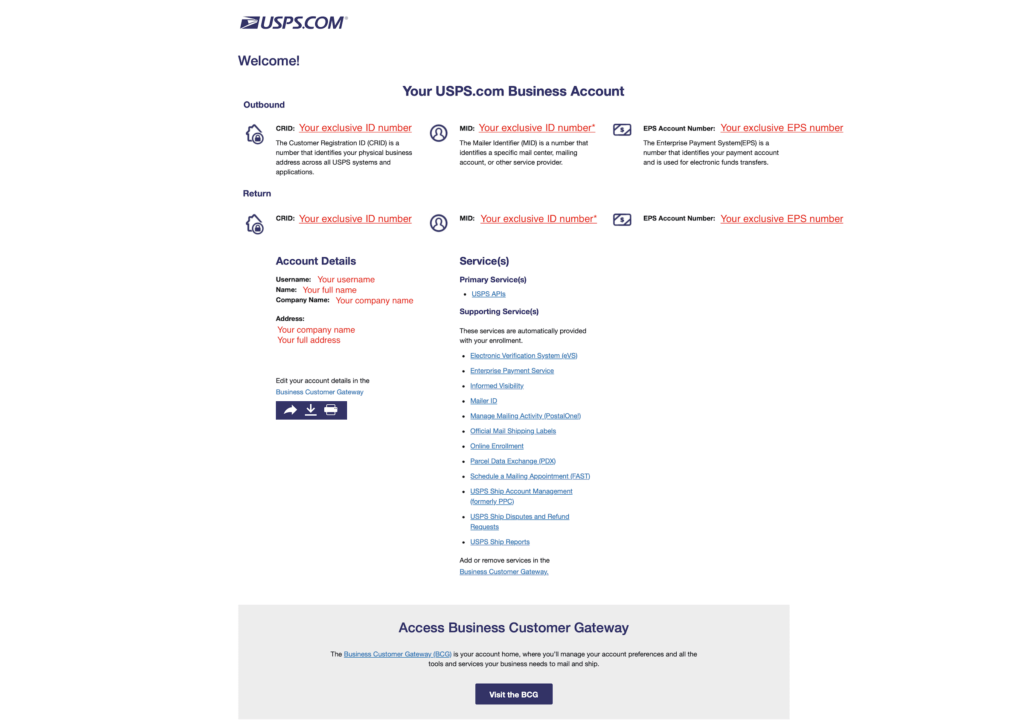
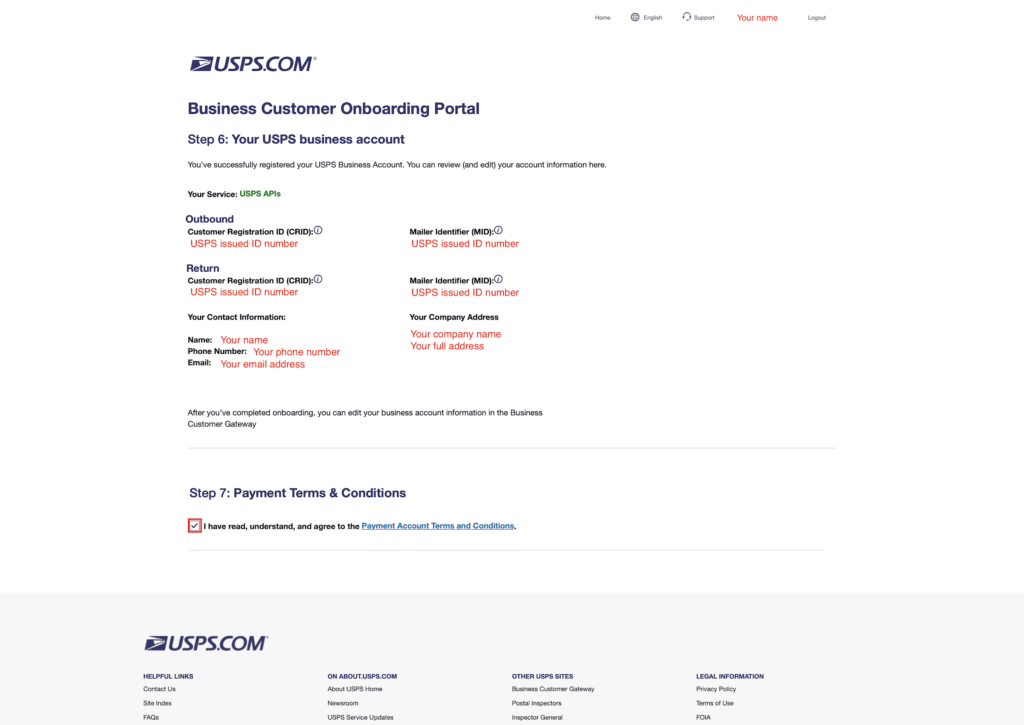
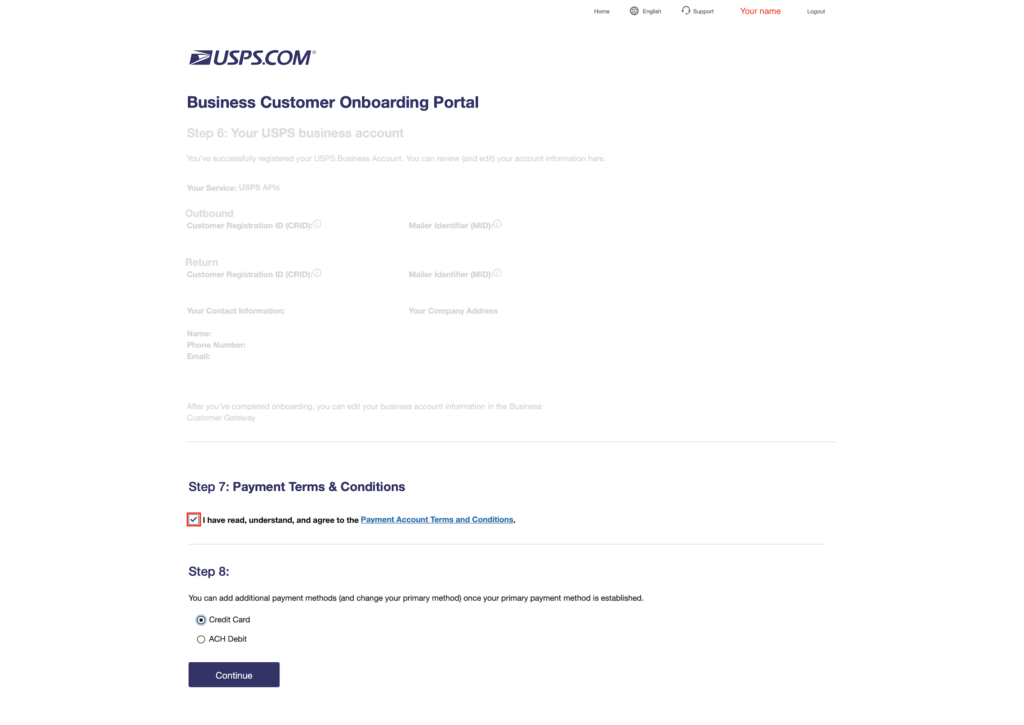
Now you have successfully registered your USPS® Business Account. Please keep the API information secure as you will need them to input in SHIP&TRACK Account Setting. Please be advised that Outbound Mailer ID (Outbound MID) is different than Return Mailer ID (Return MID). Check the box for terms & conditions in “Step 7” and the page will automatically continue to “Step 8”.
STEP 1-10
Choose either “Credit Card” or “ACH Debit”. You can add additional payment methods or change your primary payment method later. Please click ‘Continue’ to input your payment method.
STEP 1-11
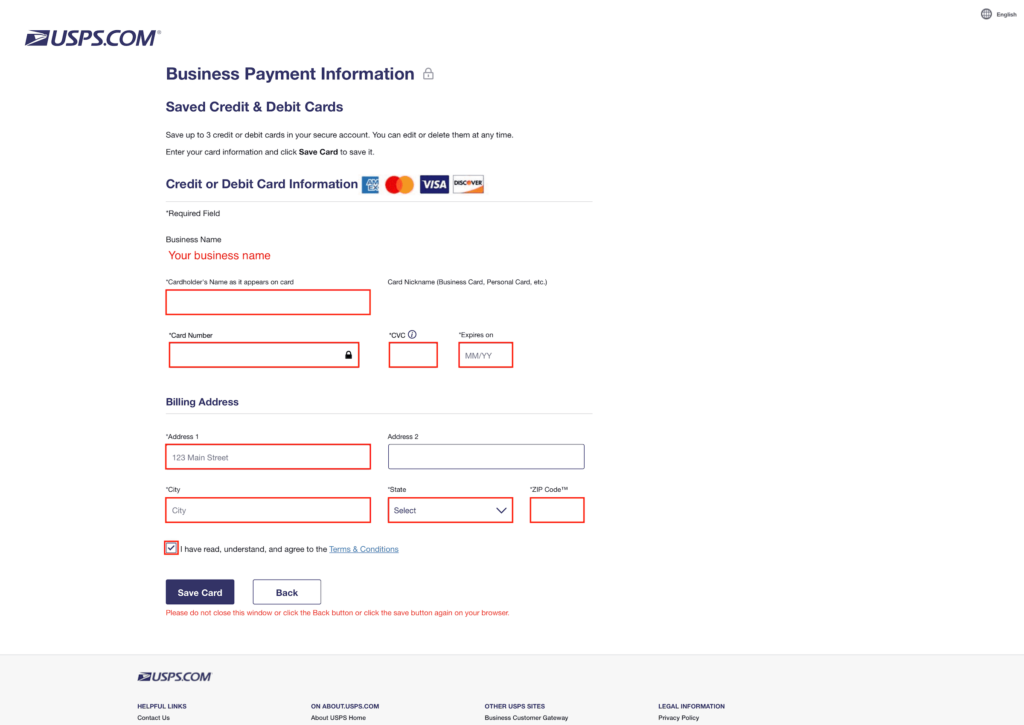
IMPORTANT – Please do not close this window or click the Back button or click the Save button again on your browser. After completing information input, click ‘Save Card’ ONCE.
Please input your credit or debit card information and your billing address. Check the box for “Terms & Conditions” and click on ‘Save Card’.
STEP 1-12
Congratulations! You have finished setting up your APIs for your business account. Please verify all your information again. Be advised that your Customer Registration ID (CRID) and your Enterprise Payment System (EPS) numbers are the same for both Outbound and Return. USPS® system just runs them separately so only MID or the Mailer Identifiers are different.
